
Knowledge base · Print prep
Packaging artwork requirements - bleed, dielines, barcodes, and ink limits.
A packaging file can look finished on screen and still fail at proof stage if it sits on the wrong dieline revision, places a barcode on a score line, or uses print settings that do not match the board and process.
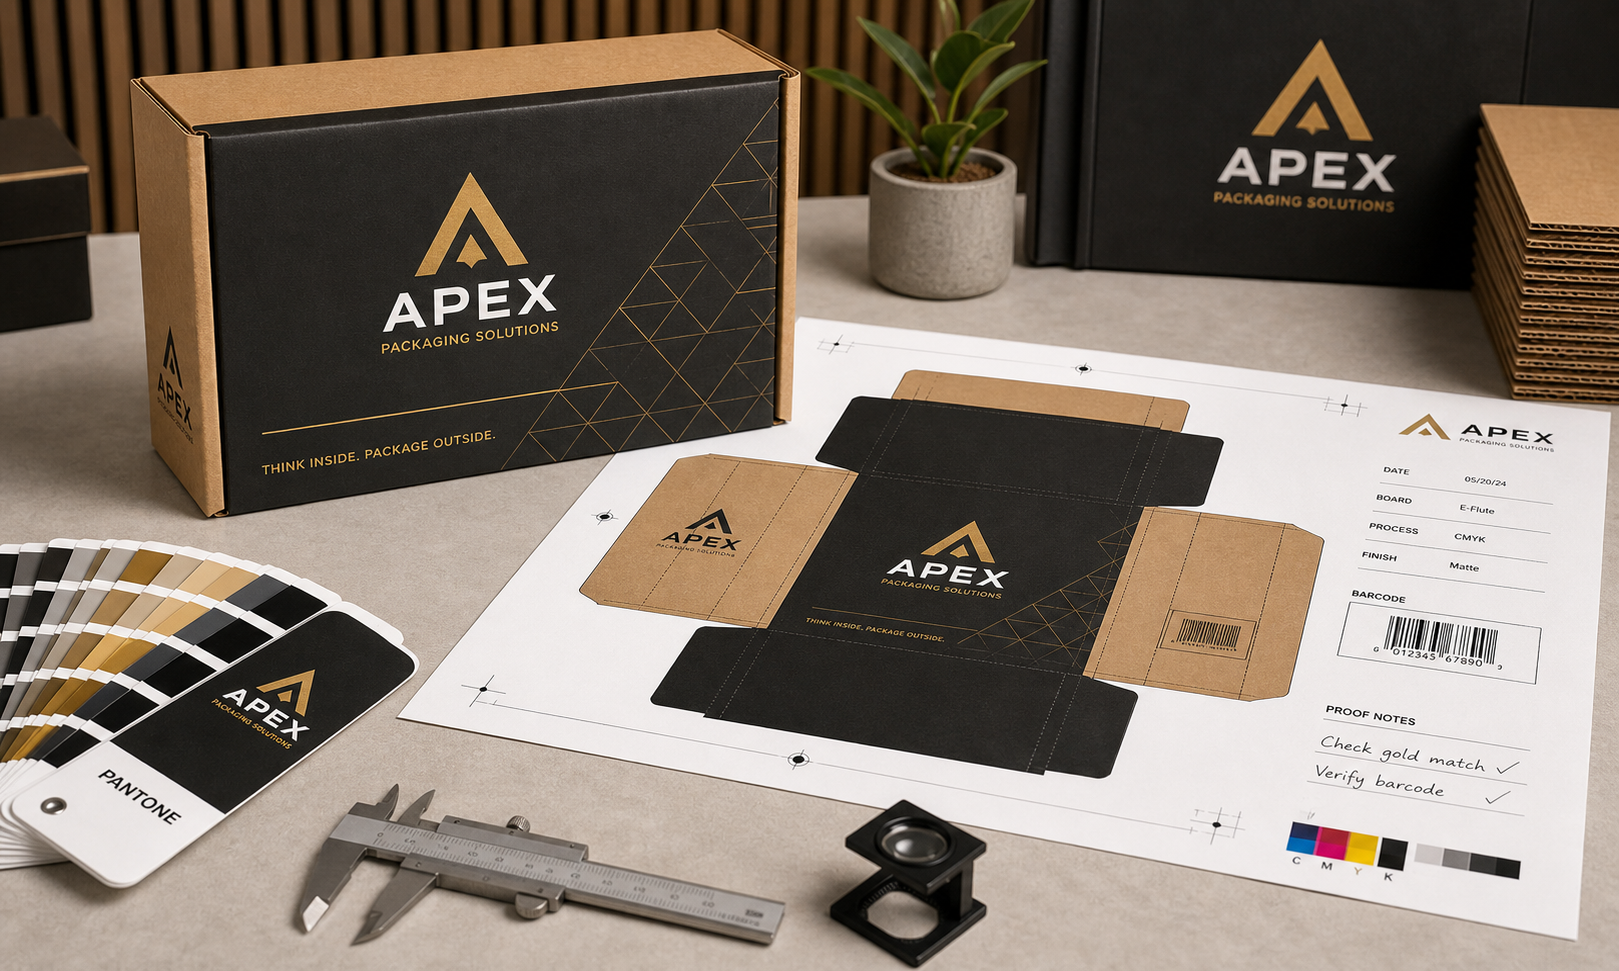
Packaging artwork requirements are usually where a simple custom box project either stays on schedule or loses a week to avoidable revisions. Marketing may have the approved logo and campaign copy, but the print file still has to fit the exact dieline, hold bleed beyond the cut edge, protect barcode quiet zones, and follow the print limitations of the selected board and process. If any of those items are missed, the supplier sends the file back for correction or, worse, the issue appears after proofing has already started.
Apex Packaging Solutions reviews artwork for custom mailer boxes, corrugated shipping cartons, and other production packaging programs that need a clean handoff from design to manufacturing. This guide is for buyers who already have artwork in motion and want a practical checklist before the file is approved. If the structure itself still needs to be drawn, start with the related guide on what to send before a dieline is built and then return to this article for print prep.
Start with the approved dieline revision, not a visual mockup
The fastest way to create rework is to lay artwork onto an older dieline export or a flattened mockup image instead of the current structural file. Packaging artwork must be built on the exact dieline revision the converter approved for production. That file controls panel size, fold positions, glue flaps, lock tabs, dust flaps, and any no-print areas. A small structural change can move important artwork onto a score line or cut off mandatory copy without anyone noticing until the PDF is preflighted.
This matters even more when the project has gone through a few rounds of fit checks. Once a box depth changes or an insert panel is adjusted, the artwork file should be re-linked to the latest dieline immediately. Buyers should ask the supplier to mark every revision clearly and retire the earlier template from circulation. Good revision control does more for approval speed than adding another design review meeting.
The core artwork checklist before the file leaves marketing
| Checkpoint | Why it matters | Typical failure if skipped |
|---|---|---|
| Correct dieline revision | Keeps all art aligned to the final structure | Logos, legal copy, or barcodes drift onto folds or get trimmed |
| Bleed and safe area | Protects edges and keeps key copy away from trim | White slivers appear at cut edges or text sits too close to the knife |
| Barcode quiet zone | Preserves scan reliability after print and folding | Retail or warehouse scans fail because art crowds the symbol |
| Colour and spot-callout review | Matches the file to the chosen print process | Brand colour shifts or a required spot colour disappears in export |
| Linked image resolution | Prevents soft logos, textures, and product shots | Proof looks sharp on screen but weak on the printed board |
| Font and outline check | Stops substitution or missing-glyph errors | Approved copy reflows when the printer opens the file |
That table is the minimum. For regulated products, add lot code positions, caution statements, bilingual text requirements, or any customer-specific shipping label zones. The objective is to remove assumptions before the file reaches prepress, not after the proof has already been routed back with questions.
Bleed, trim, and safe area should be confirmed from the printer file, not guessed
Most buyers know they need bleed, but the practical mistake is assuming every packaging job uses the same value. A common starting point is 3 mm, or 1/8 inch, beyond the cut line. That is only a starting point. The real source of truth is the supplied dieline and the printer's notes. Corrugated, folding carton, labels, and digitally printed mailers can each have their own expectations around cut tolerance and safe area.
The rule for designers is simple: extend background colour, patterns, and edge artwork fully through the bleed zone, and keep small type, logos, and fine keylines back inside the safe area. Buyers should also watch score lines. A headline can technically fit on a panel and still look poor if the fold breaks through the middle of a word or if a logo straddles a corner radius. That is one reason design support and prepress review are valuable even when the artwork seems finished.
Barcode placement is an engineering issue, not only a design issue
Barcodes are often treated like one more artwork element to fit into the layout, but they behave differently from decorative graphics. They need quiet space around the symbol, enough contrast between bars and background, and a flat panel that will not distort after scoring, gluing, or compression. If a barcode sits too close to a fold, seam, or corner radius, the printed symbol may scan poorly even though the digital file itself looks fine.
A practical review step is to ask where the package will actually be scanned. Retail cartons may need the code on a predictable display panel. Warehouse outer cartons may need the code placed where pallet labels and tape will not cover it. On ecommerce mailers, the barcode may need to coexist with shipping labels, making panel hierarchy even more important. Buyers should flag those operational realities before the proof is approved, not after the first receiving complaint.
Ink limits change with board and print process
Ink-limit problems usually appear when artwork was designed for a smooth digital screen or coated-sheet print process and then dropped onto corrugated without adjusting the file. Heavy solids, rich black builds, and dense shadow detail do not behave the same way on kraft or corrugated liners as they do on a coated brochure. Flexographic print, direct print on corrugated, litho-lam, and digital production all have different tolerances for total ink coverage and fine detail.
The buyer does not need to become a press operator, but the buyer should ask one clear question: was this file prepared to the supplier's print specification for this board and process? If the answer is vague, the risk is real. In practice, that means confirming the expected colour profile, whether brand colours need spot-ink treatment, how fine the reverse type can be, and whether large dark fields will hold cleanly on the selected substrate. This is especially important when artwork moves between printed mailers and standard corrugated shippers because the same artwork concept may need a different production treatment.
What to send for first-pass artwork approval
Most approval cycles speed up when the buyer sends one complete package instead of separate notes from marketing, operations, and purchasing. A practical first-pass package should include:
- The approved dieline revision in editable and PDF form.
- The artwork file placed on that revision, plus a press-ready PDF for review.
- Font package or outlined text confirmation.
- Logo files, brand colours, and any spot-colour callouts.
- Barcode file source, target symbology, and the panel where it must remain readable.
- Notes on mandatory regulatory copy, bilingual requirements, or customer label zones.
- The print process if already known: flexo, digital, litho-lam, or another route.
- A marked visual proof showing anything that should not move during revisions.
That package lets Apex or any qualified converter review the file against both structural and print realities. If your team is still mixing structural questions with artwork questions, separate them. Use the structural brief to get the dieline right first, then use this artwork checklist to move the file through proofing without preventable changes.
The best packaging artwork approval is uneventful. The box folds correctly, the barcode scans, the bleed holds, and the file reaches print with no late surprises. That is the standard buyers should aim for because it protects both schedule and reorder consistency.
Related
Send the dieline and artwork file together for review.
Revision control, barcode placement, and print-process notes are usually enough to catch artwork issues before proofing.